August 9, 2026 · 13 min read · Azmi Mhamed
How Much Does a Professional Soil Test Cost? (2026 Lab Pricing & ROI Guide)
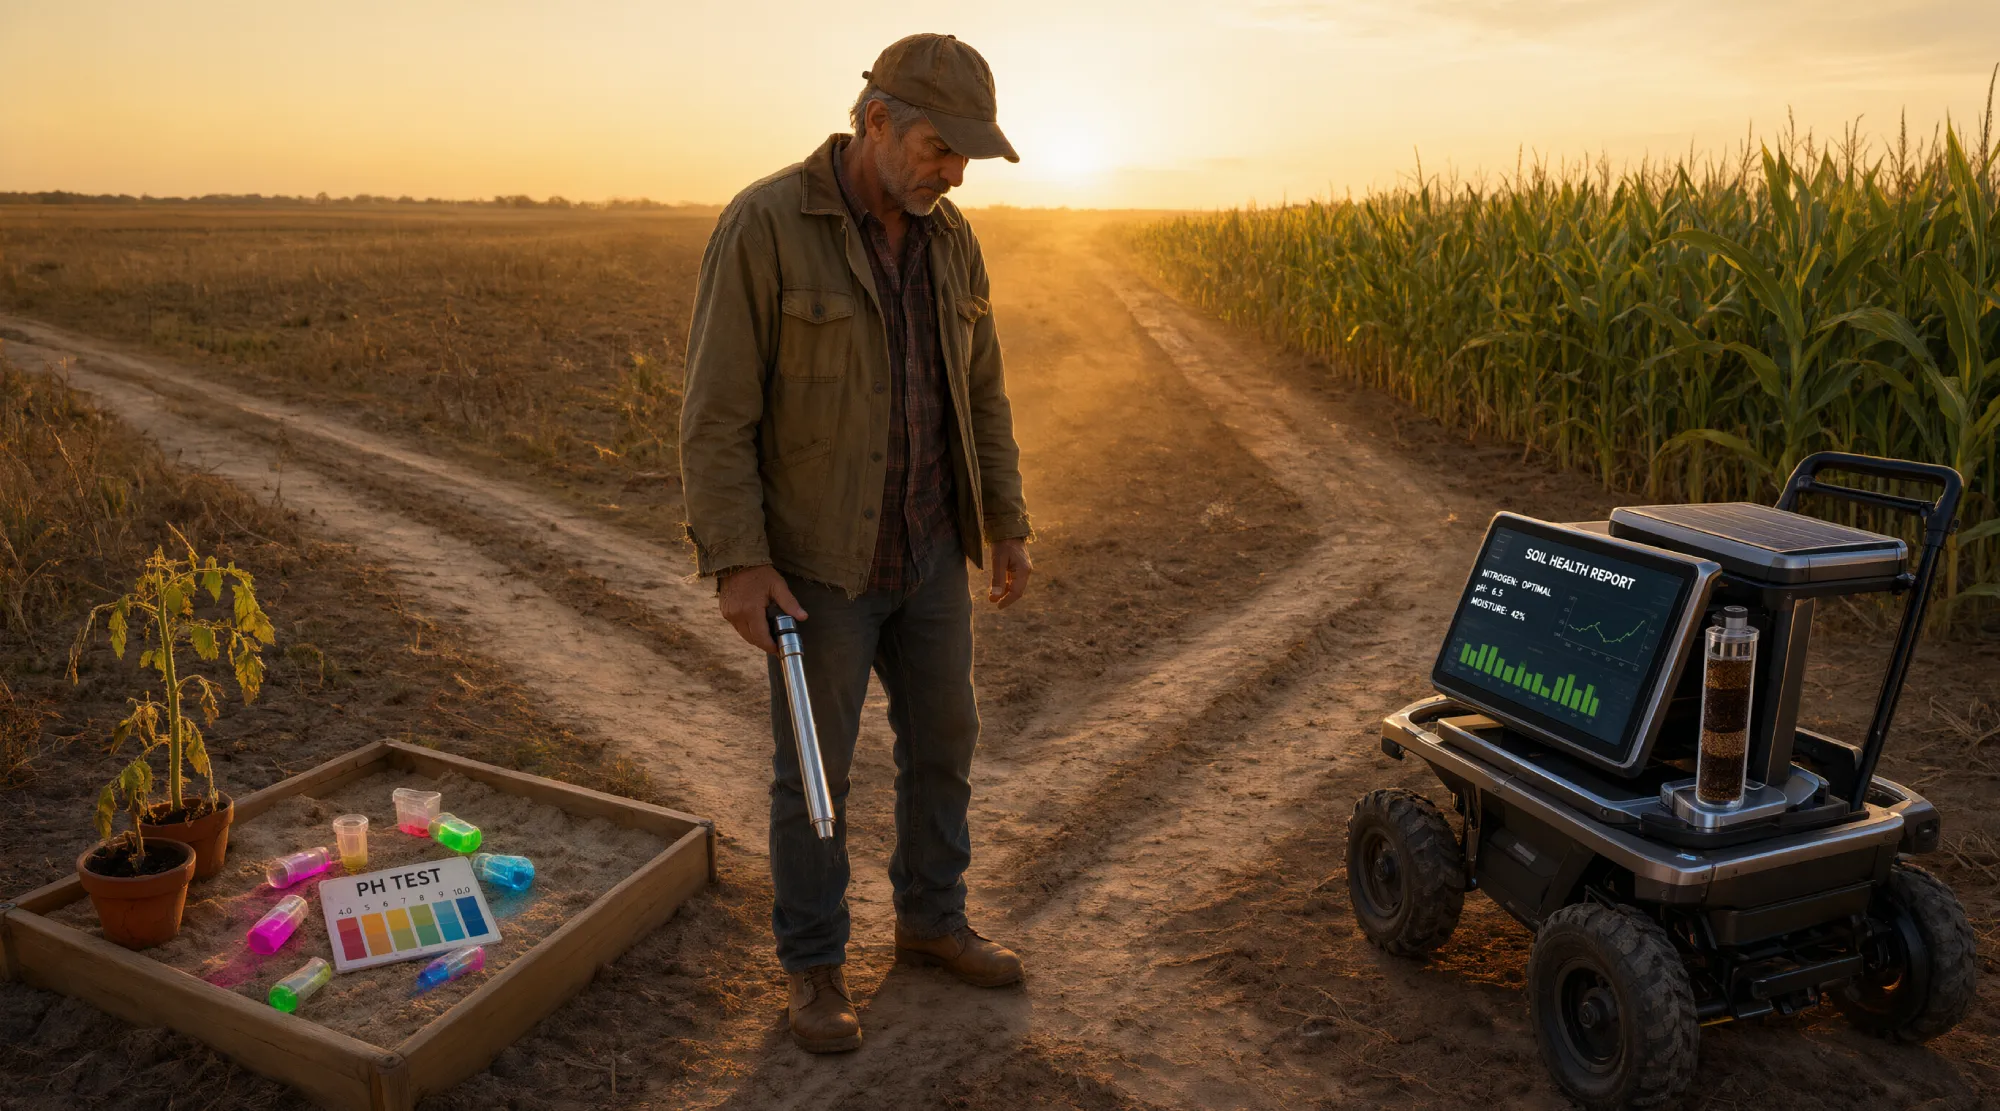
If you have outgrown the colored-water DIY kits from the local garden center, you are likely standing at a frustrating crossroads. You know your crops, pasture, or large-scale market garden need precise data to thrive, but the world of professional soil testing for farming can feel like an exclusive club guarded by complex jargon and vague pricing.
When you search for a soil analysis cost, most generic home improvement sites will lazily tell you that a test costs “between $15 and $50.” For a commercial farmer or a serious homesteader, that estimate is practically useless. A basic pH check is vastly different from a comprehensive biological soil health assessment.
If you are intimidated by the laboratory submission process, confused by terms like “cation exchange capacity,” and wondering how much does soil test cost when you actually need actionable agronomic data, this guide is for you. Below, we bypass the generic estimates and provide a transparent, tiered 2026 pricing matrix for professional labs, followed by a hard look at the Return on Investment (ROI).
How Much Does a Professional Soil Test Cost? (Quick Answer)
A professional soil analysis cost ranges from $10 to $25 for basic university extension fertility checks, $30 to $75 for comprehensive agronomic profiles, and $65 to $150+ for advanced biological soil health assessments. Hidden fees like shipping and agronomist recommendations can add $15 to $40 per batch.
Why Your DIY Soil Analysis Test Kit Isn’t Enough for Farming
Over-the-counter soil analysis test kit options rely on colorimetric reactive powders. These powders degrade rapidly in humidity and typically only measure basic NPK (Nitrogen, Phosphorus, Potassium) and pH levels.
While fine for a backyard tomato patch, these kits fail completely for commercial agriculture. They cannot measure Cation Exchange Capacity (CEC), base saturation percentages, or critical micronutrients like boron and zinc. If you are managing cash crops or transitioning to regenerative agriculture systems, relying on a DIY kit is equivalent to navigating a ship without a compass. You need the precision of mass spectrometry and advanced extraction methods that only a professional laboratory can provide.
The 2026 Professional Soil Testing Pricing Matrix
To give you total transparency, we have broken down professional soil test for farming costs into three distinct tiers based on current 2026 fee schedules from top-tier independent agricultural laboratories and university extension services.
Tier 1: The Basic Fertility Check ($10 – $25 per sample)
What it includes: Soil pH, Buffer pH (to determine lime requirements), basic macronutrients (Phosphorus and Potassium), and a standard Cation Exchange Capacity (CEC) reading.
Best for: Routine annual maintenance, basic pasture management, or establishing a baseline for a new plot of land.
The Cost Reality: University extension services heavily subsidize these tests for local residents. For example, basic tests at the UNH extension start around $10 to $11 (UNH Extension price list). Private labs also publish entry-level packages on fee sheets you can read before you send samples (Midwest Labs soil test pricing).
Tier 2: Comprehensive Agronomic Analysis ($30 – $65 per sample)
What it includes: Everything in Tier 1, plus secondary macronutrients (Calcium, Magnesium, Sulfur), a full suite of micronutrients (Zinc, Iron, Manganese, Copper, Boron), precise Organic Matter percentage, and Base Saturation levels. These usually utilize advanced extraction methods like Mehlich-3.
Best for: Serious soil testing for farming, cash crop optimization, diagnosing mysterious mid-season yield drag, and balancing soil cations for improved soil structure.
The Cost Reality: This is the sweet spot for most commercial growers. Published fee schedules put a standard comprehensive package at about $27, with complete profiles and saturated-paste extracts at the top of the tier: Logan Labs lists $27 standard, $32 with extras, $33 saturated paste, $60 complete and $65 complete with extras (Logan Labs price list).
Tier 3: Advanced Soil Health & Biological Testing (premium tier)
What it includes: The chemical and physical data from Tier 2, combined with biological indicators. This often includes the Haney Test, Solvita 24-hour CO2 burst (measuring microbial respiration), Water Extractable Organic Carbon (WEOC), and microbial biomass estimates.
Best for: Regenerative agriculture practitioners, farmers transitioning from synthetic to organic systems, and those focused on maximizing long-term soil biology and carbon sequestration.
The Cost Reality: Because these tests need specialist incubation and biological assays, they are the most expensive tier. Biological markers, heavy-metal screenings and specialist extractions are priced as add-ons, so a combined profile runs well above a standard chemical package: request a written quote before you commit.
Hidden Costs to Watch Out For
When budgeting for your soil analysis cost, the lab’s sticker price is rarely the final out-of-door cost. Be prepared for a few ancillary fees:
- Shipping: Soil is surprisingly heavy. A single pint-sized bag of dirt weighs about a pound. Shipping 5 to 10 samples via USPS Flat Rate or UPS Ground can add $15 to $30 to your total bill. Many university programs note that the base fee covers the lab test but does not include shipping: see Winnebago County Extension’s fee sheet.
- Recommendation Fees: Some private labs charge the base fee for the raw chemical data, but charge an additional $3 to $8 per sample to have an agronomist write custom fertilizer prescriptions based on your specific crop yield goals.
- Specialty Extractions: If your soil is highly alkaline or calcareous, a standard Mehlich-3 extraction will yield inaccurate results. Requesting an Olsen P or Saturated Paste extraction may carry a small upcharge at commercial labs.
How Much Does a Soil Test Cost? Common Questions
The pricing matrix above gives the ranges; these are the phrasings growers actually ask, and the detail each one is really after.
How much does a soil test cost?
$10 to $25 at a university extension lab for a basic fertility panel (pH, buffer pH, phosphorus, potassium, CEC), $30 to $75 at a private lab for a comprehensive agronomic profile with micronutrients and organic matter, and $65 to $150+ for biological assays such as the Haney test. Budget another $15 to $40 for shipping and for agronomist-written recommendations.
How much does a soil test cost for a whole farm?
The per-sample price is unchanged; what grows is the sampling plan. Ten to twenty grid samples with shipping lands most operations between $150 and $600 a year, which is small against a single blanket fertiliser application over the same acreage. The fertilizer blend calculator is where that lab data turns back into a bill for inputs.
Is a cheap soil test kit the same as a lab test?
No. A $30 DIY kit reads pH and N-P-K from colourimetric powders that degrade with age and humidity, and it reports pH to within about 0.5 units rather than 0.1. It cannot measure CEC, base saturation or micronutrients, so once your lab reports a CEC, run the numbers through the CEC calculator for the saturation picture. The full kit-versus-lab comparison is in choosing a soil testing kit or meter.
How often should I pay for a professional soil test?
Annually for high-value cash crops, every two to three years for pasture, orchards and permanent ground, and 6 to 12 months after any lime or sulphur correction cycle. Expensive data changes slowly: once the CEC, micronutrients and buffer pH are on file, follow-up monitoring can run on a home kit and a soil pH plant database lookup for your crop targets.
University Extension vs. Private Labs: Which Should You Choose?
Choosing where to send your dirt is just as important as knowing what to test for. Here is how the two primary laboratory avenues compare for commercial growers.
| Feature | University Extension Labs | Private Independent Labs |
|---|---|---|
| Cost | Low ($10 – $25). Heavily subsidized by state funding. | Medium to High ($30 – $150+). Market-rate pricing. |
| Calibration | Highly calibrated to local regional soils and crops. | Calibrated to national/international agronomic standards. |
| Turnaround Time | Slow (1–3 weeks), especially during spring planting rushes. | Fast (2–5 days), with expedited options available. |
| Biological Testing | Rarely offered. Focus is primarily on chemical fertility. | Widely available (Haney Test, CO2 burst, microbial assays). |
| Best For | Budget-conscious routine maintenance and local baseline data. | Precision agriculture, biological farming, and rapid decision-making. |
The 3R Soil ROI Framework: Is It Worth It?
Knowing how much does soil test cost is only half the equation; the real question is whether the data pays for itself. In commercial agriculture, the ROI of professional testing is mathematically proven. We define the 3R Soil ROI Framework to measure the true value of professional lab testing: Reduce synthetic inputs through precise prescriptions, Retain maximum yield by eliminating hidden nutrient deficiencies, and Regenerate long-term biological capital by tracking organic carbon.
Reduce: Massive Fertilizer Cost Reductions
Blindly applying NPK based on regional averages is a massive financial leak. By utilizing deep soil testing before planting major crops like corn, cotton, or wheat, AgriLife Extension analyses have projected fertilizer savings ranging from $13 to $189 per acre (AgriLife Extension deep soil testing analysis). On a larger scale, farmers who soil-test and then variable-rate their fertility spend less on fertilizer than blanket applications of the same total: the saving depends on crop, field variability and prices, so the honest way to size it is your own records over a season or two. A few hundred dollars of lab testing is easy to justify against even a small cut in a five-figure fertilizer bill.
Retain: Protecting and Maximizing Yield
Saving money on fertilizer is useless if your crop starves. Conversely, over-applying nutrients can cause toxicities that stunt growth. Research shows that fields falling into the “very low” soil test category saw yield increases 80% of the time when properly fertilized based on lab recommendations: see South Dakota Extension’s yield-response table. Furthermore, soil testing combined with targeted crop management has been shown to increase yields significantly, and the return comes back through less wasted input and better yields. That is profit added to your bottom line simply by knowing what your soil actually lacks.
Regenerate: Environmental Stewardship and Compliance
Beyond the balance sheet, precise soil testing for farming drastically reduces the environmental impact of agriculture. By only applying the nutrients your soil can hold and your crops can use, you prevent excess phosphorus and nitrogen from leaching into local waterways (US EPA nutrient pollution overview). As environmental regulations regarding agricultural runoff become stricter, having documented lab reports proving your precise nutrient management strategy is invaluable for compliance and sustainable farming certifications.
Decoding the Lab Report: Jargon Translated
The primary intimidation factor for new lab users is the dense, chemistry-heavy report that arrives in your inbox. Here is a quick translation guide to the most common terms:
- CEC (Cation Exchange Capacity): Think of this as your soil’s “fuel tank size.” It measures the soil’s ability to hold onto positively charged nutrients (like calcium, magnesium, and potassium) and keep them from washing away. A low CEC (under 5) means sandy soil that needs frequent, small feedings; a high CEC (over 20) means heavy clay that holds nutrients well but may suffer from drainage issues.
- Base Saturation: This is the percentage of the CEC “fuel tank” occupied by specific nutrients. Ideal soils generally have a balanced saturation (e.g., 65-75% Calcium, 10-15% Magnesium, 2-5% Potassium). If one nutrient is overly dominant, it can chemically “lock out” others, meaning you could have plenty of potassium in the soil, but the plant cannot access it.
- Mehlich-3 vs. Saturated Paste: These are simply the chemical “soups” the lab uses to extract nutrients from your dirt. Mehlich-3 is the standard for acidic to neutral soils in the Eastern and Midwest US. If you are farming in highly alkaline, arid, or saline soils (common in the Western US), a Saturated Paste extract provides a much more accurate picture of what your plants will actually uptake.
How to Take a Professional Soil Sample (Step-by-Step)
You do not need a degree in agronomy to collect a professional-grade sample. The lab can only analyze what you send them, so proper collection is critical.
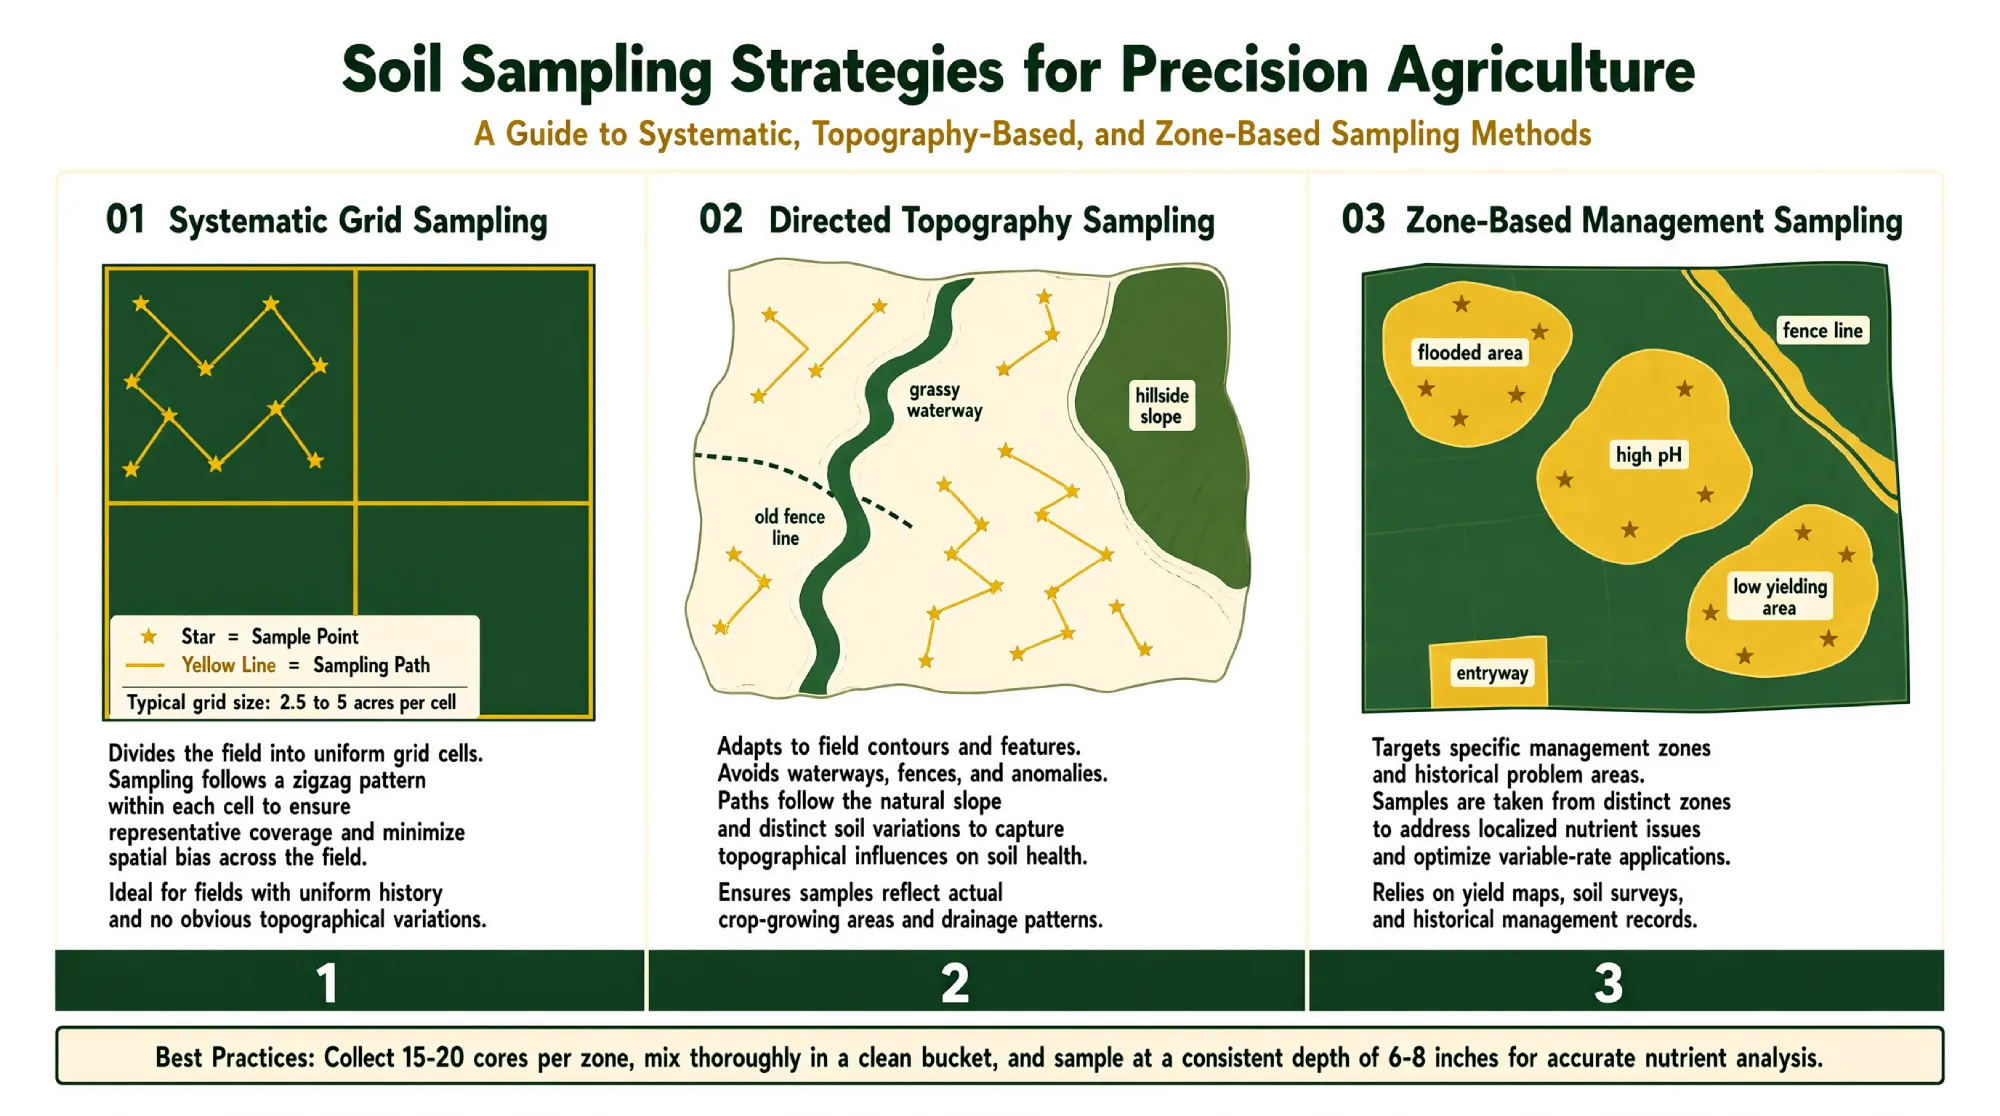
- Use the Right Tools: Use a stainless steel soil probe or a clean plastic spade. Avoid galvanized metal tools or buckets, as the zinc coating will leach into your sample and ruin the micronutrient reading.
- The Zigzag Method: Never take a single scoop from one spot. Walk your field or garden in a zigzag pattern, taking 15 to 20 core samples. For row crops and pastures, core down to about 6 to 8 inches. For deeper-rooted crops or deep nutrient profiling, you may need to sample at 24 inches.
- Mix and Bag: Break up the cores and mix them thoroughly in a clean plastic bucket. Remove a representative sub-sample, place it in the paper or plastic bag provided by the lab, and let it air dry out of direct sunlight.
- Avoid Contamination: Never sample near old fence lines, where cattle congregate, or where manure piles have recently sat, unless you are specifically testing those high-traffic zones. These areas will skew your phosphorus and potassium levels dramatically.
- Fill Out the Submittal Form: This is where you tell the lab what you are growing (e.g., “Irrigated Corn” or “Organic Tomatoes”). The lab uses your target crop and historical yield goals to calculate exact fertilizer rates on your final report.
When and How Often Should You Test?
Timing your soil test for farming is just as critical as the test itself. For high-value annual cash crops, testing should be done annually. For pastures, perennials, and orchards, testing every two to three years is generally sufficient.
Fall Testing: This is the gold standard for most agronomic operations. Fall testing allows you to apply lime (which takes months to react and adjust pH) and plan your winter cover crop strategies based on residual soil nitrogen.
Spring Testing: Spring testing is best for capturing a real-time snapshot of mobile nutrients like nitrate-nitrogen and sulfur right before planting. This allows for precise starter fertilizer adjustments based on winter leaching or mineralization rates.
Stop Guessing, Start Managing
Transitioning from DIY kits to professional laboratory analysis is one of the highest-leverage decisions a farmer or serious grower can make. While a soil analysis cost might range from a quick $15 basic check to a $75 comprehensive biological profile, the financial risk of guessing your soil’s needs is vastly higher.
Whether you are looking to slash your fertilizer budget, troubleshoot a stubborn yield plateau, or build long-term biological soil health, the data provided by a professional lab pays for itself in the very first season. Pick your tier, grab a clean plastic bucket, and send your soil to the lab, your future harvest will thank you.
Sources
- Soil pH and Lime Requirement, University of Wisconsin-Madison Extension; backs (Quick Answer) A professional soil analysis cost ranges from $10 to $25 for basic university extension fertility checks, $30 to $75 for comprehensive agronomic profiles, and $65 to $150+ for advanced biological soil health assessments..
- Soil Acidity and Liming for Agricultural Soils, NC State Extension; backs Annually for high-value cash crops, every two to three years for pasture, orchards and permanent ground, and 6 to 12 months after any lime or sulphur correction cycle..
- Fundamentals of Soil Cation Exchange Capacity (CEC), Purdue University Extension; backs Ideal soils generally have a balanced saturation (e.g., 65-75% Calcium, 10-15% Magnesium, 2-5% Potassium)..
- Nutrient Management (AC 590) Conservation Practice Standard, USDA Natural Resources Conservation Service; backs By utilizing deep soil testing before planting major crops like corn, cotton, or wheat, AgriLife Extension analyses have projected fertilizer savings ranging from $13 to $189 per acre ( AgriLife Extension deep soil testing analysis )..
Frequently Asked Questions
How deep should I take a soil sample for farming?
For standard row crops and pastures, you should core soil samples to a depth of 6 to 8 inches to capture the primary root zone. For deep-rooted perennials, orchards, or nitrate leaching assessments, sampling down to 24 inches is recommended.
Can I use a galvanized spade to collect soil samples?
No, you should never use galvanized metal tools or buckets for soil sampling. Galvanized steel is coated in zinc, which will leach into your sample and artificially inflate your micronutrient readings, rendering the lab report inaccurate.
Does a soil analysis test kit measure organic matter?
Most over-the-counter soil analysis test kits cannot measure organic matter or biological activity. Professional laboratories use loss-on-ignition (LOI) or combustion methods to accurately calculate precise organic matter percentages and microbial respiration rates.
Numbers and claims in this guide were last checked on 28 September 2026: how we check our sources.