If you need to know your soil’s pH today and you don’t want to spend $20 or more on a dedicated garden soil kit, you have options. You can test soil pH with a pool kit, use litmus paper, brew red cabbage juice, or even use vinegar and baking soda. However, not all of these hacks are created equal. Some are surprisingly accurate, while others are little more than kitchen myths.
The real secret to successful DIY soil pH testing isn’t the indicator you use; it’s how you prepare the soil sample. Most DIY failures happen because people test dry dirt, muddy water, or use tap water instead of creating a clear soil slurry.
This guide explains the scientifically backed method for preparing your soil, and then ranks four household hacks by their accuracy and cost. If you are wondering how to test the pH of soil without a kit, this slurry step is the single biggest upgrade you can make to get a reliable reading.
Quick Answer: Can You Test Soil pH with a Pool Kit?
Yes, but only as a rough estimate. Most pool pH test kits use a color-changing chemical reagent (usually phenol red) designed to read clear pool water. Their useful range is typically between pH 6.8 and pH 8.2. While this is perfect for keeping swimming pools safe, garden soil can be much more acidic (pH 4.5) or alkaline (pH 8.5+). Therefore, testing soil pH with a pool kit will only give you a ballpark answer rather than a precise number.
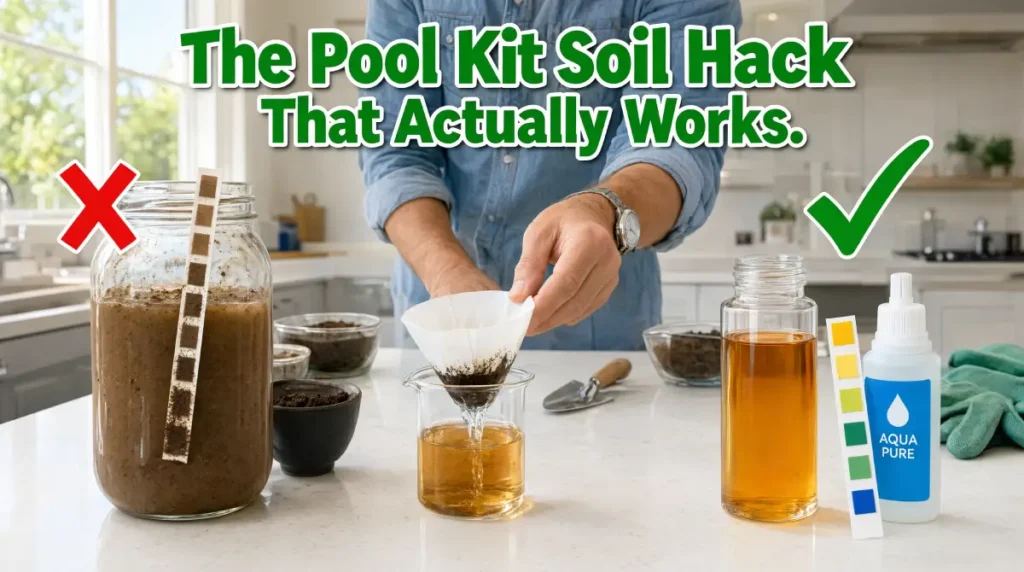
Furthermore, you cannot put dirt directly into a pool test vial. Pool reagents are designed to read crystal-clear water. If your sample is cloudy or brown, the color chart becomes completely useless. You must extract the clear liquid from the soil first.
The Science: Why You Must Use a “Soil Slurry” (Not Dry Dirt)
Soil pH is not measured in the solid dirt itself; it is measured in the “soil solution”, the microscopic film of water surrounding soil particles where plant roots actually absorb nutrients. Professional laboratories measure pH by mixing soil with distilled water or a calcium chloride solution.
At home, the closest and most accurate practical method is a 1:1 soil slurry: one part soil to one part distilled water.
Why Distilled Water is Non-Negotiable
You must use distilled water, not tap water. Tap water contains dissolved minerals, chlorine, and alkalinity that have their own pH. If your tap water is naturally alkaline, it will artificially push your soil test result higher. Distilled water is neutral and has almost zero buffering capacity, meaning it won’t interfere with your soil’s natural pH.
How to Make a 1:1 Soil Slurry for Any DIY Hack
This preparation step is the foundation for every method below. If you skip it, your result will measure the flaws of your test method rather than your actual soil.
- Step 1: Take several small soil samples from the plant’s root zone (usually 2 to 6 inches deep). Combine them in a clean container. Remove any surface mulch, undecomposed compost, roots, and stones.
- Step 2: Break up any large dirt clumps. The soil should be loosely mixed.
- Step 3: Add one level tablespoon of your mixed soil into a clean cup.
- Step 4: Add one level tablespoon of distilled water.
- Step 5: Stir vigorously for 15 to 30 seconds to fully saturate the soil.
- Step 6: Let the mixture sit undisturbed for 5 to 10 minutes so the heavy dirt particles can settle to the bottom.
- Step 7: Pour the liquid at the top through a clean coffee filter into a second cup.
- Step 8: Test only this filtered, clear liquid (called the supernatant). If it is still cloudy, filter it a second time.
Method 1: Test Soil pH with a Pool Kit
If you already have a swimming pool or hot tub, you likely have a test kit in the garage. To test soil pH with a pool kit, fill the pH test vial with your clear, filtered soil liquid instead of pool water. Add the normal number of pH reagent drops, swirl to mix, wait for the color to develop, and compare it to the kit’s color chart.
Crucial Rules for Pool Kits:
- Use only the pH reagent. Do not use the chlorine, bromine, or alkalinity tests. Those measure entirely different chemicals and will give you zero information about your soil.
- If your pool kit uses test strips instead of liquid drops, dip the strip into the clear soil liquid for one second, shake off the excess, and compare it immediately before it dries.
- Compare the vial in bright, natural daylight. Indoor yellow lighting will completely distort the color reading.
Accuracy vs. Cost Rating:
Accuracy: 4/10. (Limited by the narrow 6.8–8.2 range of pool chemicals).
Cost: $15–$25 (for a basic liquid drop kit) or ~$10 (for pool test strips).
Best Use: Quickly checking if your soil is heavily alkaline or near-neutral if you already have pool supplies lying around.
Main Limitation: If your soil is highly acidic (pH 5.0), the pool kit will just turn “yellow” (its lowest reading) and won’t tell you if it’s 5.5 or 4.5.
Method 2: How to Test Soil pH with Litmus Paper
If you are wondering how to test soil pH with litmus paper, the process is incredibly simple, but you need to know which type of paper to use. Basic “litmus paper” only tells you if something is acidic or alkaline (blue turns red in acid; red turns blue in alkaline). For a better result, buy “Universal pH paper,” which changes through a rainbow of colors to give you an estimated number.
Dip only the very tip of the paper strip into your clear, filtered soil slurry for two seconds. Remove it, wait for the color to stabilize (usually 15 seconds), and compare it to the included color wheel.
Pro-Tip: Do not press the paper directly into wet dirt or muddy slurry. The natural brown color of soil organic matter will stain the paper and ruin the color reading. Always use the filtered, clear liquid.
Accuracy vs. Cost Rating:
Accuracy: 5/10 (with Universal pH paper) or 3/10 (with basic red/blue litmus).
Cost: $5–$10 (for a pack of 50 to 100 strips online or at a hardware store).
Best Use: An inexpensive, broad screening of your soil’s acidity with a wider color range than pool kits.
Main Limitation: Low resolution. It is hard to distinguish between a pH of 6.0 and 6.5 with the naked eye, and dark soil extracts can stain the paper.
Method 3: The Red Cabbage pH Indicator
If you have absolutely no testing supplies, red cabbage is your best friend. Red cabbage contains anthocyanins, natural water-soluble pigments that change color dramatically depending on the pH of the liquid they are in. This is one of the most reliable ways to figure out how to test the pH of soil without a kit using purely household items.
How to make it: Chop half a red cabbage, simmer it in a pot of distilled water for 10 minutes, strain out the leaves, and let the purple water cool. This is your indicator.
Mix equal parts of your clear soil slurry and the cabbage juice in a clear glass. Observe the color change:
- Pink / Bright Red: Highly acidic soil.
- Purple: Near-neutral soil.
- Blue / Green / Yellow-Green: Alkaline soil.
Accuracy vs. Cost Rating:
Accuracy: 3/10.
Cost: $2–$3 (for a head of red cabbage) or $0 (if you already have one in your fridge).
Best Use: A fun, highly visual home demonstration to see the general direction of your soil’s pH when you have zero other supplies.
Main Limitation: Highly subjective. The colors are open to interpretation, it takes 15 minutes to prep, and it won’t give you a usable numerical pH value.
Method 4: The Vinegar and Baking Soda “Fizz” Test
You have probably seen this hack on social media: pour vinegar on soil to test for alkalinity, or mix soil with baking soda to test for acidity. While famous, this is the weakest and most misleading method on this list.
The fizz test does not measure pH. It only detects a physical reaction when acids or carbonates are present in massive, concentrated amounts. If you pour vinegar on your soil and it fizzles, you likely have highly alkaline, chalky soil. But if it doesn’t fizz, it doesn’t necessarily mean your soil is acidic; it might just be mildly alkaline, or the soil might be too wet. Soil moisture, organic matter, and temperature all distort this test.
Accuracy vs. Cost Rating:
Accuracy: 1/10.
Cost: $3–$5 (for a small bottle of white vinegar and a box of baking soda).
Best Use: A middle-school science experiment or confirming the presence of heavy chalk/carbonate in very alkaline soils.
Main Limitation: Massive false-negative rate. It cannot give you a pH number, and it will fail to detect mildly acidic or alkaline soils entirely.
Summary: Which DIY Hack Should You Choose?
If you need a quick directional answer and already own pool supplies, testing soil pH with a pool kit using a filtered slurry is your fastest route. If you are willing to spend five dollars, buying a pack of universal pH paper is vastly superior to all other DIY methods. If you have zero budget and zero supplies, the red cabbage hack is a brilliant, scientifically sound workaround. Skip the vinegar and baking soda entirely.
Common Mistakes That Ruin DIY Soil Tests
Even with the best hack, you will get bad data if you make these common errors:
- Using Tap Water: As mentioned, tap water has its own pH and minerals. Always use distilled water.
- Testing immediately after watering or applying fertilizer. Wait at least two weeks after adding lime, sulfur, or heavy fertilizers before testing.
- Testing only the surface: The top half-inch of soil is highly acidic due to decaying leaves. Always sample from the 2-to-6-inch root zone.
- Waiting too long to read the color: Chemical indicators and pH papers continue to change color as they dry or react with oxygen in the air. Read your results within the exact time window specified by the kit.
What Your Result Actually Means
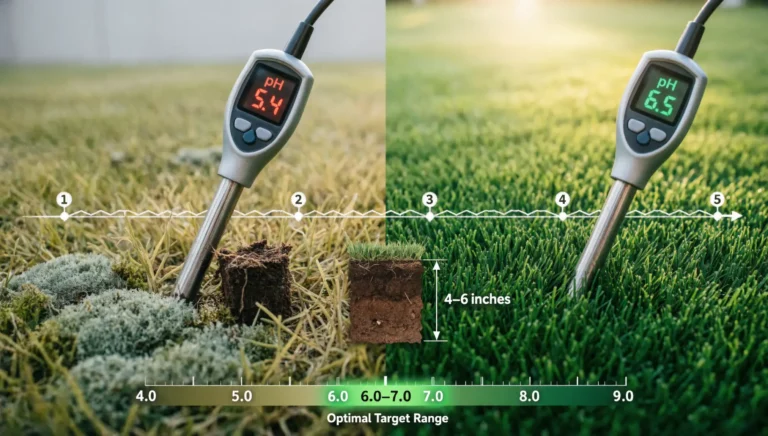
Soil pH dictates nutrient availability. Around pH 6.0 to 7.0, most common garden vegetables, lawn grasses, and flowers can easily access the major nutrients in the soil.
If your DIY test shows your soil is below 5.5 (too acidic), phosphorus becomes locked up, and toxic levels of aluminum can be released, stunting root growth. You will need to apply garden lime to raise the pH.
If your test shows your soil is above 7.5 (too alkaline), plants cannot absorb iron, manganese, or zinc. This results in “chlorosis”, leaves that turn yellow while the veins remain green. You will need to apply elemental sulfur or an acidifying fertilizer to lower the pH.
Ready to Upgrade Your Accuracy?
DIY hacks are fantastic for a quick weekend check, but they are approximate. If you are planning a major landscape installation, troubleshooting a dying lawn, or growing sensitive crops like blueberries, you need a precise number.
Upgrade to dedicated soil pH test strips or a professional chemical drop kit. They are specifically calibrated for the full 4.0 to 9.0 soil range, eliminating the guesswork. Read our complete step-by-step guide on How to Test Soil pH with Strips to get lab-quality results in your own backyard.