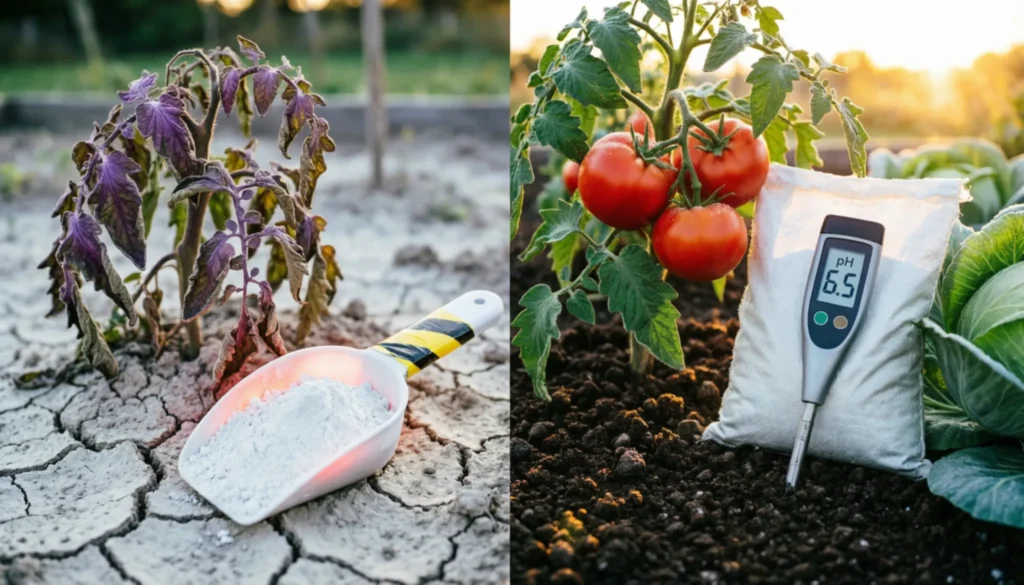
Applying lime to garden soil can unlock nutrients for an entire season, yet one careless scoop can lock them away just as fast. Most guides still hand out a blanket “5 to 10 pounds per 100 square feet” rule with zero regard for heavy clay versus loose sand. The result is stunted tomatoes, purple cabbage leaves, and alkaline soil that no amount of compost fixes.
Done correctly, liming garden beds is one of the highest-payoff amendments you can make. Get the type, rate, or timing wrong, and you risk root burn, wasted money, or a calcium imbalance that takes years to correct.
This guide gives you what the big publishers won’t. You get a Safe-Lime Application Matrix calibrated to soil texture and current pH, a clear warning about the one lime type that should never touch a home garden, and a safe step-by-step method.
Table of Contents
- What Does Lime Do for Garden Soil?
- The 4 Types of Lime (And Which to Avoid)
- Step 1: Test Your Soil pH (Don’t Guess)
- Step 2: Calculate Your Safe Application Rate
- Step 3: Applying Lime to Garden Soil Safely
- When to Apply Lime: Fall vs. Spring Rules
- How to Add Lime to Soil Naturally (Alternatives)
- Vegetables That Love Lime (And Those That Hate It)
- Key Takeaways: Safe Lime Application Basics
- Lime Application FAQ: Rates, Timing, and Safety
What Does Lime Do for Garden Soil?
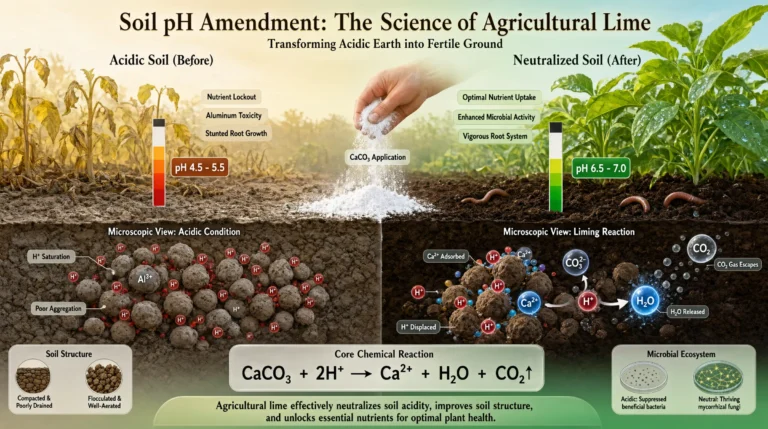
Garden lime, most commonly calcium carbonate (CaCO3), raises the pH of acidic soil toward neutral (6.0–7.0). Most vegetables absorb nutrients most efficiently inside that window. Below pH 6.0, phosphorus, magnesium, and molybdenum become chemically unavailable to roots, no matter how much fertilizer you add.
Beyond pH correction, lime supplies calcium, the structural nutrient that strengthens cell walls and prevents blossom end rot in tomatoes and peppers. In heavy clay, it also flocculates particles, improving drainage and aeration over time. According to the USDA NRCS soil chemistry fact sheet, this slow reaction is why growers treat lime as a conditioner, not a quick fix.
In practice, think of lime as a slow-release soil amendment. A soil amendment is any material added to soil to improve its chemical or physical properties; agricultural lime is primarily used to neutralize soil acidity, and it differs from fertilizer because it feeds soil chemistry, not plants directly. Full pH adjustment typically takes 3 to 6 months, depending on particle size and moisture.
The 4 Types of Lime (And Which to Avoid)
Not all “lime” is created equal. Choosing the wrong product is the single most common mistake we see in home gardens.
Agricultural (Calcitic) vs. Dolomitic Lime
- Agricultural (Calcitic) Lime: Ground limestone that is roughly 35–40% calcium. Best when your soil test shows adequate magnesium but low pH.
- Dolomitic Lime: Contains both calcium and 8–12% magnesium carbonate. Choose it only if your test confirms a magnesium deficiency; over-applying on magnesium-rich soil locks out potassium.
Both come in powdered or granular form. Both are safe soil amendments when applied at tested rates.
Pelletized Lime (The Beginner’s Choice)
Pelletized lime is finely ground calcitic or dolomitic lime bound into small pellets with a water-soluble binder. It spreads evenly through a broadcast spreader, produces almost no dust, and breaks down faster than raw powder. If you have never limed before, start here.
Hydrated Lime (The Danger Zone)
⚠️ DO NOT USE HYDRATED (SLAKED) LIME IN YOUR GARDEN.
Hydrated lime, also called builder’s lime or calcium hydroxide (Ca(OH)2), is far more caustic than agricultural lime. It raises pH almost instantly, which sounds convenient but causes severe root burn, destroys soil microbes, and can push pH past 9.0 in a single application. It is manufactured for mortar and construction, not horticulture.
If a bag says “hydrated,” “slaked,” or “calcium hydroxide,” put it back.
Hydrated lime is calcium hydroxide, a caustic construction material. It is primarily used for mortar, and it differs from agricultural lime because it reacts violently and can sterilize garden soil.
Step 1: Test Your Soil pH (Don’t Guess)
You cannot safely calculate a lime rate without two data points: your current soil pH and your soil texture (sand, loam, or clay). Guessing is how gardens get ruined. In practice, a $20 lab test prevents a $200 mistake.
How to test:
- Purchase a lab-grade soil test kit from your local cooperative extension office or a reputable lab. Basic kits run $15–$25 and return pH, Cation Exchange Capacity (CEC), and base saturation percentages.
- Collect 10–15 cores from 4–6 inches deep across your garden bed. Mix them in a clean bucket and submit one composite sample.
- Wait 1–2 weeks for results. Your report will state current pH, recommended lime rate, and whether you need calcitic or dolomitic lime.
The key insight is your CEC value. High-CEC clay soils resist pH change and require more lime per square foot, while low-CEC sandy soils shift quickly and need less. Cation Exchange Capacity is a measure of how strongly soil holds nutrients; it is primarily used to predict buffering behavior, and it differs from pH because it measures capacity, not acidity. This distinction is critical, and it is exactly what generic guides ignore.
Ready to stop guessing? Our guide to choosing lab-grade soil test kits and meters walks you through exactly what to order and why.
Step 2: Calculate Your Safe Application Rate
Lime application rates depend on soil texture and current pH, ranging from 2 to 12 pounds per 100 square feet. Sandy soil needs the least; heavy clay needs the most. Find your soil type and pH gap in the Safe-Lime Matrix below.
| Current pH → Target 6.5 | Sandy Soil (lbs / 100 sq ft) | Loam Soil (lbs / 100 sq ft) | Clay Soil (lbs / 100 sq ft) |
|---|---|---|---|
| 5.5 → 6.5 | 2 – 3 | 4 – 5 | 6 – 7 |
| 5.0 → 6.5 | 4 – 5 | 6 – 7 | 8 – 10 |
| 4.5 → 6.5 | 5 – 6 | 8 – 9 | 10 – 12* |
*For pH below 4.5, split the application into two seasons to avoid shocking soil biology.
Quick rule of thumb: If your pH deficit is more than 1.0 point, never apply the full rate in one season. Split it across fall and the following spring.
However, if your soil test recommended a specific rate, defer to that number. It accounts for your exact CEC and organic matter content, which no generic chart can see. Our guide to soil reaction (pH) translates your test numbers into plain English, so you know exactly what to fix.
Step 3: Applying Lime to Garden Soil Safely
Applying lime to garden soil follows a simple sequence once your rate and type are set. Even coverage and proper safety gear matter more than raw speed. Here is the exact order we use on our own beds each fall.
- Mow or clear the bed. Remove debris so lime contacts soil directly.
- Put on safety gear. Wear a dust mask (N95 minimum), safety glasses, and gloves. Even agricultural lime dust irritates lungs and eyes.
- Calibrate your spreader. Set a broadcast spreader (or handheld rotary spreader) to the manufacturer’s lime setting. For small beds under 200 sq ft, hand-broadcasting with a scooping motion works fine.
- Apply in two passes. Walk the bed north–south first, then east–west. This cross-hatch pattern eliminates striping.
- Incorporate into the top 6 inches. For new beds, till the lime in. For established beds with perennials, gently rake or top-dress and water thoroughly.
- Water it in. Apply ½ to 1 inch of irrigation to activate the breakdown process and prevent wind loss.
- Wait before fertilizing. Do NOT apply nitrogen fertilizer within 3–4 weeks of liming. The reaction between lime and ammonium-based fertilizers releases ammonia gas, wasting nitrogen and potentially harming nearby foliage, our guide on applying fertilizer and lime at the same time explains the chemistry.
Pro tip: For large plots, pelletized lime through a drop spreader gives the most uniform coverage with the least dust. Our Lawn Liming Blueprint covers spreader strategy and rate math for bigger areas.
If your test also flags low magnesium, pelletized dolomitic lime handles calcium and magnesium in one pass. It spreads cleanly, stores well, and suits beginner hands, our ag lime vs. pelletized lime comparison breaks down the true cost and labor trade-offs before you buy.
When to Apply Lime: Fall vs. Spring Rules
| Factor | Fall Application | Spring Application |
|---|---|---|
| Best lime type | Powdered agricultural or dolomitic | Pelletized (fast-acting) |
| Time to react | 3–6 months over winter | 4–6 weeks (limited) |
| Ideal for | New beds, major pH correction (>0.5 point) | Minor top-ups (<0.5 point) |
| Risk | Very low, no active roots to disturb | Moderate, may clash with early planting |
| Our recommendation | ✅ Preferred | ⚡ Acceptable only with pelletized |
As a rule, fall wins because winter moisture and freeze-thaw cycles break down lime particles gradually. That delivers a ready-to-plant pH by spring.
However, if you missed fall and your soil test still shows acidic readings in March, pelletized lime is your only realistic spring option. Apply it at least 3–4 weeks before planting. Need region-specific windows? Our zone-by-zone lime timing guide maps the best dates for your climate.
How to Add Lime to Soil Naturally (Alternatives)
Prefer a no-bag approach? Several natural amendments add calcium carbonate slowly and keep pH maintained once corrected.
- Hardwood ash: Raises pH and adds potassium. Apply no more than 2 lbs per 100 sq ft per year. Test pH regularly, ash is potent.
- Oyster shell flour (crushed oyster shells): Slow-release calcium source. Work 5–10 lbs per 100 sq ft into beds in fall. Takes 1–2 seasons to shift pH noticeably.
- Eggshells (the honest truth): They contain calcium carbonate, but the surface area is far too small for meaningful pH change unless ground to a fine powder and composted for 12+ months. They’re a supplement, not a lime substitute.
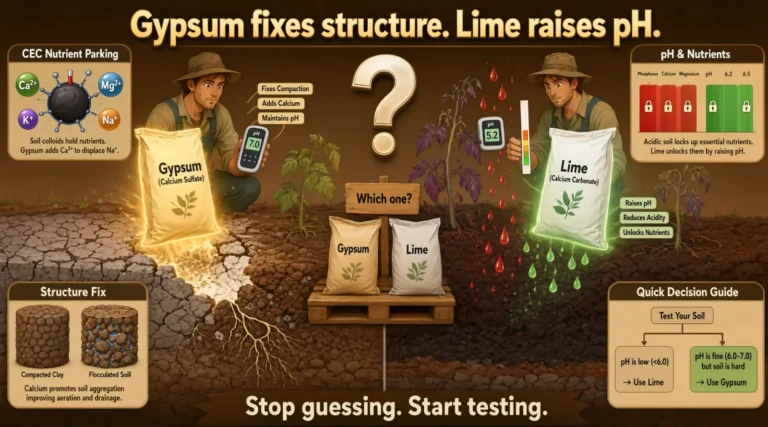
However, these work well for maintenance only; they will not fix a 5.0 reading in one season. For serious correction, agricultural lime remains the most reliable tool. Keep compost coming to build organic matter alongside pH, and see our gypsum vs. lime guide if you’re also battling heavy clay.
Vegetables That Love Lime (And Those That Hate It)
🟢 Lime lovers (target pH 6.5–7.0): Cabbage, broccoli, cauliflower, kale (brassicas benefit enormously, lime suppresses clubroot fungus), tomatoes, peppers, and spinach.
🔴 Lime haters (target pH 4.5–5.5): Potatoes (high pH encourages scab), blueberries, azaleas, rhododendrons, and sweet potatoes. Never lime these beds.
In practice, if you rotate brassicas and nightshades in the same plot, lime to 6.5 and keep potatoes in a separate, un-limed section. Our guide to how lime works in soil explains the calcium chemistry behind problems like blossom end rot, so you can fix them without over-liming.
Key Takeaways: Safe Lime Application Basics
- Test before you spread. A $20 soil test prevents a $200 mistake. Your pH and CEC dictate everything.
- Use the Safe-Lime Application Matrix. Rates vary from 2 to 12 lbs per 100 sq ft depending on soil texture and pH gap. Never rely on a single generic number.
- Avoid hydrated lime entirely. It is a construction product and will scorch your garden.
- Fall is the ideal window. Give lime 3–6 months to work before spring planting.
- Space lime and fertilizer by 3–4 weeks to prevent nitrogen loss via ammonia volatilization.
Applying lime to garden soil never has to feel like a gamble. Test first, follow your matrix rate, and let winter do the work, then walk into spring with beds that finally let your vegetables thrive.