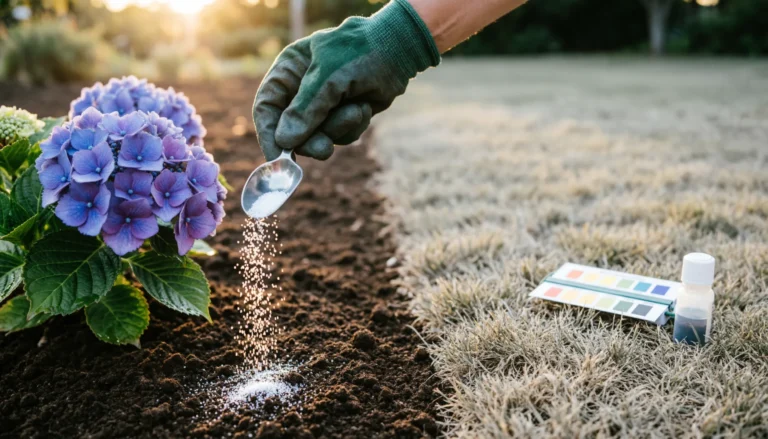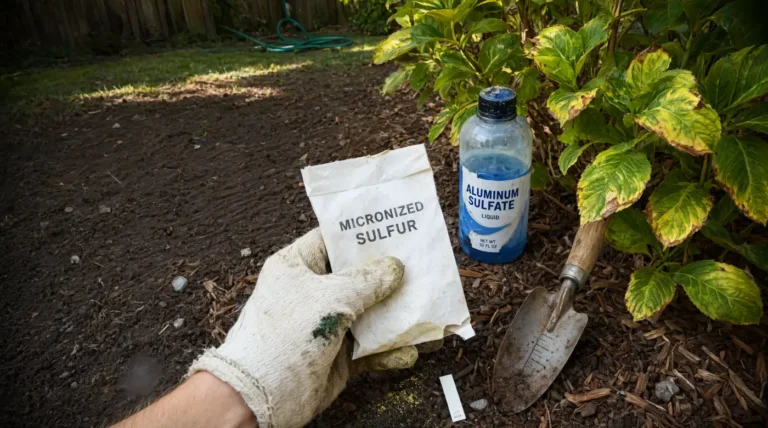
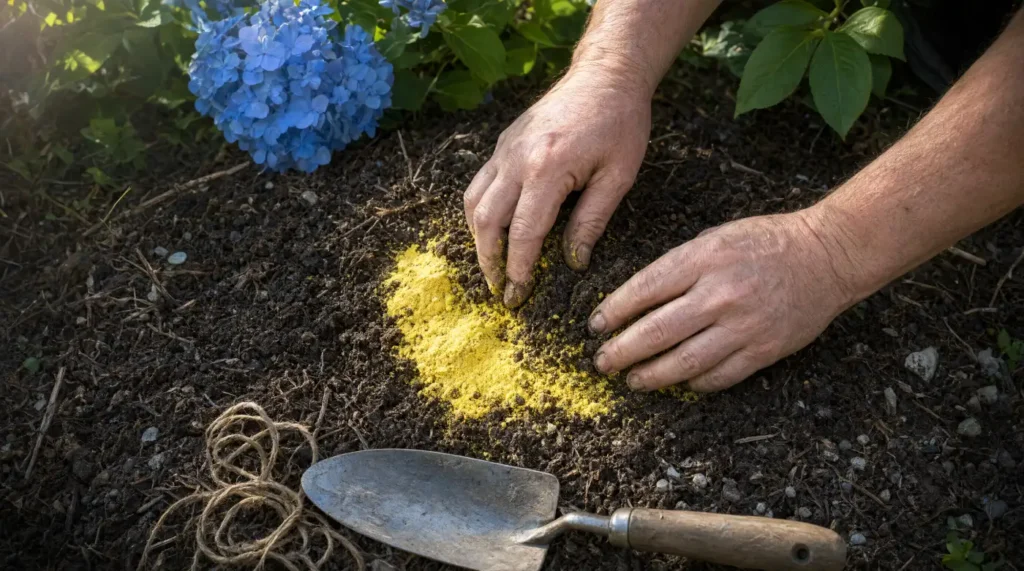
If you are looking to use sulfur to lower soil pH, you are probably trying to fix alkaline conditions for acid-loving plants such as blueberries, azaleas, rhododendrons, camellias, hydrangeas, or certain vegetables. The fastest way to lower soil pH with sulfur is not simply to spread sulfur on the soil and hope for the best. Elemental sulfur works through a biological process: soil bacteria must convert it into sulfuric acid. That means the speed of your results depends heavily on microbial activity, moisture, temperature, oxygen, and soil preparation.
This guide focuses on the Microbe Multiplier Method: a practical system for making sulfur work faster by supporting the bacteria that oxidize it. Instead of treating sulfur as a chemical “switch,” you will learn how to create the ideal environment for sulfur-oxidizing microbes to multiply, move, and produce acidity efficiently. If you want to know how to lower pH in soil quickly while still using a long-term, soil-friendly approach, this is the complete breakdown.
Quick Answer: Does Sulfur Lower pH and How Fast Does It Work?
Yes, does sulfur lower pH? Absolutely, but not instantly. Elemental sulfur lowers pH through a biological process where soil bacteria convert it into sulfuric acid. If you are wondering how to lower soil ph fast, the secret is to use finely ground micronized sulfur, apply it in warm soil (above 65°F), and mix it with finished compost to feed the bacteria. Under ideal conditions, you will see results in 4 to 6 weeks. To know exactly how much sulfur to add to soil, use our Precision pH Down Calculator rather than relying on generic charts.
The key insight is this: elemental sulfur itself is not strongly acidic. It becomes acidic after soil bacteria oxidize it into sulfuric acid. Therefore, the faster you help those bacteria work, the faster your soil pH will drop.
Why Sulfur for Lowering pH in Soil Works Differently From Other Amendments
Many gardeners assume that sulfur lowers soil pH immediately, the way vinegar or acid fertilizers might. That is not how elemental sulfur behaves. Elemental sulfur is relatively neutral when first applied. The pH change happens after sulfur-oxidizing bacteria convert elemental sulfur into sulfuric acid. This biological conversion is what makes sulfur a powerful long-term acidifying amendment, but it also means timing depends on living soil conditions.
The basic process can be simplified as: elemental sulfur + oxygen + water + sulfur-oxidizing bacteria = sulfuric acid. The acid then reacts with alkaline soil components, releases hydrogen ions, and lowers pH. In calcareous soils, the acid may first neutralize calcium carbonate before the measured pH drops significantly. This is why high-lime soils can require repeated sulfur applications.
Compared with synthetic quick-fix products, elemental sulfur is slower but vastly more stable and less likely to cause sudden salt injury. If you are researching how to add sulfur to soil naturally, elemental sulfur is the ultimate organic-approved amendment. It mimics the natural earth-bound sulfur cycle, relying on native Thiobacillus bacteria rather than dumping harsh chemical acids directly onto plant roots. It is the most reliable, soil-friendly option for sustained plant health.
The Chemical Contrast: Sulfur vs. Lime
Comparison Table: Sulfur vs. Other pH-Lowering Methods
| Method | Speed | Duration | Safety | Cost | Best For |
|---|---|---|---|---|---|
| Elemental Sulfur | 4-8 weeks | Long-term | High | Low | Permanent pH adjustment |
| Aluminum Sulfate | 1-2 weeks | Short-term | Moderate | Medium | Quick hydrangea color change |
| Iron Sulfate | 2-3 weeks | Medium-term | Moderate | Medium | Lawns and quick greening |
| Ammonium Sulfate | 2-4 weeks | Medium-term | Moderate | Low | Fertilizer + acidification |
| Vinegar | Immediate | Very short | Low | Low | Container emergency only |
The “pH of Sulfur” Myth: Does Elemental Sulfur Actually Have a pH?
A common search query among gardeners is the pH of sulfur. The scientific truth often surprises people: pure elemental sulfur does not have a pH.
pH is a measurement of hydrogen ion concentration in an aqueous (water-based) solution. Because elemental sulfur is a solid, water-insoluble mineral, it is completely neutral on its own. It only lowers soil pH after it is introduced to water, oxygen, and soil bacteria. The microbes oxidize the solid sulfur into sulfuric acid, which then dissolves in the soil moisture and releases the hydrogen ions that actually drop the pH. When you buy a bag of soil sulfur, you aren’t buying an acid; you are buying the raw food for acid-producing bacteria.
The Microbe Multiplier Method: The Science Behind Faster Sulfur Acidification
The Microbe Multiplier Method is based on one central fact: sulfur needs microbes. The main organisms involved are sulfur-oxidizing bacteria such as Thiobacillus, Acidithiobacillus, and related soil microbes. These bacteria obtain energy by oxidizing elemental sulfur and produce sulfuric acid as a byproduct. When their environment is favorable, they reproduce and accelerate the acidification process. When conditions are poor, sulfur can sit in the soil for a long time with little effect.
To multiply microbial activity, you need five conditions: active biology, oxygen, moisture, warmth, and sulfur that is physically accessible to microbes. The Microbe Multiplier Method focuses on all five.
1. Active Biology: Give Sulfur-Oxidizing Bacteria a Home
Sulfur-oxidizing bacteria do not “eat” compost in the same way many heterotrophic microbes do, but a biologically active soil ecosystem supports them indirectly. Finished compost improves soil structure, moisture retention, oxygen movement, and microbial diversity. It also helps buffer harsh swings in pH and salinity, making the soil a more stable environment for microbial colonization.
For best results, mix or top-dress a thin layer of finished, neutral to slightly acidic compost into the planting area before or after applying sulfur. A quarter to half inch of high-quality compost is usually enough. Avoid using raw, uncomposted wood chips, fresh manure, or heavily alkaline compost if your goal is acidification. Fresh woody material can tie up nitrogen and create unpredictable microbial competition, while alkaline compost or mushroom compost can work against your pH goal.
If your soil is very sandy, compost helps hold moisture around the sulfur particles. If your soil is heavy clay, compost improves aeration so oxygen can reach the microbes. Oxygen is essential because sulfur oxidation is largely an aerobic process.
2. Moisture: Keep the Soil Like a Wrung-Out Sponge
Moisture is one of the most important factors controlling how quickly sulfur lowers pH. Sulfur-oxidizing bacteria need water to move, grow, and react with sulfur particles. However, too much water excludes oxygen, and oxygen is also required. The ideal condition is consistent, moderate moisture, not saturated, not dusty dry.
After applying sulfur, water the area thoroughly enough to activate the soil without creating puddles. Then maintain even moisture. In warm weather, this may mean light irrigation every few days depending on soil texture and drainage. Mulching with a thin layer of straw, shredded leaves, or pine bark can reduce evaporation and help maintain stable moisture.
If the soil dries out completely, microbial activity slows. If the soil becomes waterlogged, oxygen drops and sulfur conversion slows again. The goal is steady biological activity, not maximum water.
Moisture Management Calendar for Sulfur Application
| Week After Application | Moisture Goal | Frequency | Warning Signs |
|---|---|---|---|
| Week 1-2 | Activate sulfur | Daily light watering | Standing water = too much |
| Week 3-4 | Maintain activity | Every 2-3 days | Cracking soil = too dry |
| Week 5-8 | Support conversion | Weekly deep watering | Yellowing plants = check pH |
| Week 9+ | Maintenance | Normal irrigation | Retest soil pH |
3. Temperature: Apply Sulfur When Soil Is Warm
Sulfur works fastest when soil temperatures are roughly between 65°F and 85°F. At cooler temperatures, microbial metabolism slows. In winter or cold spring soil, sulfur may remain mostly inactive for weeks. That is why timing matters if you are trying to figure out how to lower pH in soil quickly.
In most climates, late spring through early summer is the best time to apply sulfur because soil is warming, moisture can be managed more easily, and microbial populations are increasing. Fall applications can work in mild climates, but in cold regions the pH change may not show until the following warm season.
If you need rapid results, do not apply sulfur to frozen soil, cold saturated soil, or extremely dry soil. The microbes will not convert it efficiently.
Regional Timing Guide for Sulfur Application
| USDA Zone | Best Application Window | Soil Temperature Target | Expected Response Time |
|---|---|---|---|
| Zones 3-4 | May-June | 60-70°F | 8-12 weeks |
| Zones 5-6 | April-May | 65-75°F | 6-10 weeks |
| Zones 7-8 | March-April or Sept-Oct | 65-80°F | 4-8 weeks |
| Zones 9-10 | Feb-March or Oct-Nov | 70-85°F | 3-6 weeks |
4. Oxygen: Avoid Compaction and Waterlogging
Sulfur oxidation requires oxygen. Compacted soil, thick surface crusts, and saturated conditions reduce oxygen availability. Lightly incorporating sulfur into the top 2 to 6 inches of soil can improve contact with oxygen, moisture, and microbes. For established beds where heavy digging is not possible, lightly rake the sulfur into the surface and water it in.
Improving drainage also helps. If your planting area holds standing water, sulfur conversion may be slow and plant roots may suffer. In raised beds or containers, use a well-aerated acidic growing mix and avoid fine, compacted media that stays too wet.
5. Sulfur Particle Size: Smaller Particles Work Faster
The physical form of sulfur matters. Coarse sulfur granules have less surface area and may break down slowly. Dust-form, finely ground, micronized, or pastille sulfur products with dispersing agents often react faster because bacteria can access more surface area. Bentonite sulfur pastilles, for example, swell and disperse with moisture, increasing contact with soil.
If speed is your priority, choose a finer elemental sulfur product rather than large, hard prills. However, be careful with dust: apply it on a calm day, wear a mask if needed, and avoid inhaling fine sulfur particles.
Sulfur Product Type Comparison
| Product Type | Particle Size | Speed Rating | Ease of Application | Best Use Case |
|---|---|---|---|---|
| Dust/Powder Sulfur | <0.15mm | Fastest | Difficult (dusty) | Quick results, small areas |
| Micronized Sulfur | 0.15-0.3mm | Very Fast | Moderate | Balanced speed & handling |
| Bentonite Pastilles | 2-4mm | Fast | Easy | Lawn & large areas |
| Granular Sulfur | 1-3mm | Moderate | Very Easy | General garden use |
| Coarse Prills | >3mm | Slow | Very Easy | Long-term maintenance |
🧮 SoilTune Sulfur Calculator Hub
Stop guessing how much sulfur to add to soil. Our dynamic calculator factors in your exact soil texture, current buffer pH, and target acidity levels to give you a precision application rate.
How to Apply Sulfur for Lowering pH in Soil: Step-by-Step
Step 1: Test Your Soil First
Before applying sulfur, test your soil pH and, if possible, buffer pH. A simple pH test tells you where you are now. A buffer pH test helps estimate how resistant the soil is to pH change. Soils with high organic matter, high clay content, or free lime can resist pH changes much more strongly than sandy soils.
Set a realistic target pH. Blueberries often prefer pH 4.5 to 5.5. Azaleas, rhododendrons, and camellias generally like pH 5.0 to 6.0. Many vegetables perform best between 6.0 and 7.0. Potatoes may tolerate slightly acidic soil, and lowering pH can help reduce potato scab in some situations. Do not lower pH more than necessary. Over-acidification can create aluminum or manganese toxicity and reduce nutrient availability for many plants.
Target pH Ranges for Common Plants
| Plant Type | Optimal pH Range | Tolerance Range | Sulfur Need Level |
|---|---|---|---|
| Blueberries | 4.5-5.5 | 4.0-6.0 | High |
| Azaleas/Rhododendrons | 5.0-6.0 | 4.5-6.5 | High |
| Camellias | 5.5-6.5 | 5.0-7.0 | Moderate |
| Hydrangeas (blue) | 5.2-5.5 | 5.0-6.0 | Moderate-High |
| Potatoes | 5.0-6.0 | 4.8-6.5 | Moderate |
| Most Vegetables | 6.0-7.0 | 5.5-7.5 | Low |
| Lawn Grasses | 6.0-7.0 | 5.5-7.5 | Low-Moderate |
💡 Quick Tip: Looking for a specific crop, shrub, or flower? Browse our complete Plant pH Database for exact optimal ranges and soil requirements.
Step 2: Choose the Right Sulfur Product
Do not confuse elemental sulfur with a standard fertilizer with sulphur (such as potassium sulphate or ammonium sulphate). While these provide essential plant nutrients, they do not have the same reliable, long-term acidifying power as elemental sulfur.
For most gardeners, elemental sulfur is the preferred choice when the goal is to lower soil pH with sulfur safely over time. Look for products labeled as elemental sulfur, garden sulfur, soil sulfur, micronized sulfur, or sulfur pastilles.
Do not confuse elemental sulfur with gypsum. Gypsum supplies calcium and sulfur but generally does not lower pH. Do not confuse it with Epsom salt either; Epsom salt supplies magnesium and sulfur but is not a reliable acidifier. Also, lime and wood ash raise pH, so avoid them completely in areas you are trying to acidify.
Step 3: Apply the Correct Rate
Application rates vary widely depending on current pH, target pH, soil texture, organic matter, and lime content. However, general garden guidance often suggests that lowering pH by about one full point may require roughly 1 pound of elemental sulfur per 100 square feet in sandy soil, 1.5 to 2 pounds per 100 square feet in loam, and 2 to 3 pounds per 100 square feet in clay soil. A half-point reduction may require about half that amount.
If your soil pH is above 7.5 or contains free lime, these rates may not be enough. In calcareous soils, sulfur may first neutralize lime before pH drops. In that case, split applications, repeated over time, are safer and more effective than one massive dose.
Always follow the product label and soil test recommendations. If you are unsure, start with a conservative rate and retest. It is easier to add more sulfur later than to reverse soil that has become too acidic.
Sulfur Application Rate Calculator Guide
| Current pH | Target pH | Sandy Soil (lbs/100 sq ft) | Loam Soil (lbs/100 sq ft) | Clay Soil (lbs/100 sq ft) |
|---|---|---|---|---|
| 7.5 | 6.5 | 1.0 | 1.5 | 2.0 |
| 7.5 | 5.5 | 2.5 | 4.0 | 5.5 |
| 7.0 | 6.0 | 0.8 | 1.2 | 1.8 |
| 7.0 | 5.5 | 2.0 | 3.2 | 4.5 |
| 6.5 | 5.5 | 1.0 | 1.8 | 2.5 |
| 6.5 | 5.0 | 1.8 | 2.8 | 4.0 |
💡 Save time on the math: Instead of guessing, use our free Precision pH Down Calculator to get your exact sulfur application rate based on your soil test results and square footage.
Step 4: Incorporate Lightly Into the Soil
For open beds, rake or till sulfur into the top 2 to 6 inches of soil. This improves contact with moisture, oxygen, and microbes. For established shrubs or acid-loving plants, apply sulfur around the drip line and lightly scratch it into the surface without damaging roots. Water thoroughly afterward.
Surface-only applications can work, but they are usually slower because the sulfur remains concentrated at the surface and may not reach the root zone as effectively. If you are planting blueberries or azaleas, amending the planting bed before installation is often more effective than trying to fix pH around established roots later.
Step 5: Add Finished Compost to Support the Microbial Engine
After applying sulfur, add a thin layer of finished compost. This is one of the core Microbe Multiplier Method steps. The compost should be well-decomposed and not strongly alkaline. Mix it lightly into the surface if possible, or use it as a top-dress followed by watering.
This step improves moisture retention, provides a better habitat for microbes, and reduces stress on plant roots. It also helps prevent sulfur from sitting in dry, inactive soil where conversion is slow.
Step 6: Water Correctly
Water the treated area until the soil is evenly moist. Then keep it consistently moist for several weeks. The soil should feel damp but not soggy. In hot weather, check moisture regularly. In heavy clay, water more slowly to avoid saturation. In sandy soil, lighter and more frequent watering may be needed.
Proper watering is one of the easiest ways to improve sulfur performance. Dry soil delays microbial oxidation. Saturated soil reduces oxygen. Balanced moisture is the multiplier.
Step 7: Avoid Fungicides, Bactericides, Lime, and Wood Ash
If you want sulfur to work quickly, protect the microbial population doing the work. Avoid applying fungicides, bactericides, copper-heavy products, or broad-spectrum soil treatments unless absolutely necessary. Some products can reduce microbial activity, and reduced microbial activity means slower sulfur conversion.
Also avoid lime, wood ash, calcium carbonate, and strongly alkaline fertilizers in the area you are acidifying. These materials raise pH and counteract the sulfur. If your soil has a history of high pH due to irrigation water or construction fill, you may need to address those sources as well.
How to Lower pH in Soil Quickly: The Fastest Sulfur Strategy
If your main question is how to lower pH in soil quickly, the answer is to optimize every condition that sulfur-oxidizing bacteria need. The fastest sulfur strategy is: use micronized or finely ground elemental sulfur, apply it in warm soil, incorporate it lightly, add finished compost, water to even moisture, and retest after 4 to 6 weeks.
For an even quicker short-term shift, some gardeners combine sulfur with acidifying fertilizers such as ammonium sulfate, sulfur-coated urea, or acid-forming nitrogen sources. These products can provide more immediate acidity while elemental sulfur builds longer-term acidification. Use nitrogen fertilizers carefully, because excess nitrogen can burn plants, pollute water, or create overly soft growth.
For urgent situations, products such as aluminum sulfate or iron sulfate can lower pH faster than elemental sulfur because they create acidity more directly. However, they can also increase salt levels, stain surfaces, and in some cases contribute to aluminum toxicity. Aluminum sulfate is sometimes used for hydrangeas but should be used cautiously, especially around edible plants and sensitive shrubs. Elemental sulfur is usually the safer long-term choice, while aluminum sulfate or iron sulfate should be considered short-term tools rather than the foundation of a soil acidification program.
Avoid relying on vinegar as a serious pH solution. Vinegar can temporarily lower pH in container soil or irrigation water, but the effect is usually short-lived and it can disrupt soil biology if overused. For meaningful landscape changes, sulfur plus microbial optimization is more reliable.
Emergency Quick-Fix Protocol (Use With Caution)
If you absolutely must lower pH within 2-3 weeks for a specific event (like a blueberry competition or urgent transplant), follow this protocol:
- Test soil pH immediately
- Apply micronized sulfur at 1.5x the normal rate
- Water in thoroughly
- Apply aluminum sulfate at half the recommended rate for immediate effect
- Water daily to maintain moisture
- Retest in 14 days
- Do NOT use this method repeatedly, it can damage soil structure and microbial life
How Long Does Sulfur Take to Lower Soil pH?
Under ideal conditions, warm soil, adequate moisture, good oxygen, fine sulfur particles, and active microbes, gardeners may begin to see pH reduction within 4 to 8 weeks. In cooler or drier conditions, it may take several months. In cold winter soil, the change may not begin until spring warming.
In high-lime or calcareous soils, the timeline can be even longer because the sulfuric acid produced is first consumed by calcium carbonate. You may need repeated applications over multiple seasons. In these soils, raised beds filled with an acidic growing mix may be the fastest solution for acid-loving plants.
Do not expect instant results from elemental sulfur. If you need pH to change overnight or within a few days, elemental sulfur alone will not do it. But if you want a durable, plant-safe reduction and are willing to manage the microbial process, sulfur is one of the best tools available.
Timeline Expectations by Condition
| Soil Condition | Temperature | Moisture | Expected Time to See Results |
|---|---|---|---|
| Ideal | 70-80°F | Consistent | 4-6 weeks |
| Good | 65-70°F | Good | 6-10 weeks |
| Moderate | 60-65°F | Variable | 10-16 weeks |
| Poor | <60°F | Dry/Wet | 4-6 months |
| Very Poor | <50°F | Extreme | 6+ months or until next season |
Application Rates: How Much Sulfur Should You Use?
Exact sulfur rates depend on soil test results, but general starting guidelines are useful. To lower pH by approximately one full point, sandy soils often require about 0.8 to 1 pound of elemental sulfur per 100 square feet. Loamy soils may require 1.5 to 2 pounds per 100 square feet. Clay soils may require 2 to 3 pounds per 100 square feet. If you only need to lower pH by half a point, use about half the rate.
For raised beds, calculate by square footage. For example, a 4-foot by 8-foot bed is 32 square feet. If a loam bed needs one point of pH reduction and the recommended rate is 1.5 pounds per 100 square feet, you would need about 0.48 pounds, or roughly half a pound, of elemental sulfur for that bed.
For established shrubs, apply sulfur around the drip line rather than piling it against the stem. Lightly work it into the surface and water well. For containers, use much smaller amounts and consider using an acidic potting mix or acidifying fertilizer instead of heavy sulfur applications. Container pH can shift quickly, so test frequently.
If soil pH is very high, do not apply all the sulfur at once. Split applications reduce the risk of over-correction, salt stress, and root-zone problems. Apply, wait, retest, and adjust.
Practical Application Examples
Example 1: Blueberry Patch (20 ft x 10 ft = 200 sq ft)
Current pH: 7.0, Target pH: 5.5, Soil Type: Loam
Sulfur needed: 200 sq ft ÷ 100 × 3.2 lbs = 6.4 lbs elemental sulfur
Application: Split into two applications of 3.2 lbs each, 8 weeks apart
Example 2: Azalea Bed (15 ft x 6 ft = 90 sq ft)
Current pH: 6.8, Target pH: 5.5, Soil Type: Sandy Loam
Sulfur needed: 90 sq ft ÷ 100 × 2.0 lbs = 1.8 lbs elemental sulfur
Application: Single application in spring, retest in 8 weeks
Example 3: Lawn Area (50 ft x 40 ft = 2,000 sq ft)
Current pH: 7.2, Target pH: 6.5, Soil Type: Clay Loam
Sulfur needed: 2,000 sq ft ÷ 100 × 1.5 lbs = 30 lbs elemental sulfur
Application: Use broadcast spreader, apply in fall, water in well
💡 Save time on the math: Instead of guessing, use our free Precision pH Down Calculator to get your exact sulfur application rate based on your soil test results and square footage.
Signs Your Sulfur Is Working, or Not Working
The only reliable way to confirm progress is to retest soil pH. However, there are helpful field signs. If soil remains moist, warm, and biologically active, sulfur is more likely to be converting. If sulfur was applied as a fine product and lightly incorporated, results should appear sooner.
If pH is not changing after several weeks in warm weather, possible causes include soil that is too cold, too dry, too compacted, too alkaline, or too low in microbial activity. The sulfur particles may also be too coarse. In that case, improve moisture, add compost, lightly incorporate the sulfur, and consider using a finer sulfur product.
If pH drops too far, stop sulfur applications and consider adding lime only if plants are suffering from excessive acidity. In most managed garden beds, it is better to make small corrections and retest frequently.
Visual Indicators of Sulfur Activity
| Indicator | Positive Sign | Negative Sign | Action Needed |
|---|---|---|---|
| Soil smell | Earthy, fresh | Rotten eggs (H2S) | Reduce watering, improve drainage |
| Soil texture | Crumbly, loose | Hard, compacted | Aerate, add compost |
| Moisture level | Damp to touch | Dusty or soggy | Adjust irrigation schedule |
| Plant response | Gradual greening | Yellowing, stunting | Test pH, check for over-acidification |
| Sulfur visibility | Disappearing gradually | Still visible after 8 weeks | Incorporate more, check moisture |
Common Mistakes That Slow Sulfur Down
The most common mistake is applying sulfur to cold, dry soil and expecting rapid results. Sulfur-oxidizing bacteria need warmth and moisture. Another common mistake is using coarse sulfur granules and leaving them on the surface without watering. Surface sulfur may eventually work, but it is usually slower.
Overwatering is another issue. Saturated soil reduces oxygen, slowing sulfur oxidation. Applying lime, wood ash, or alkaline compost at the same time as sulfur is also counterproductive. Using broad-spectrum fungicides or bactericides can reduce microbial activity. Finally, applying too much sulfur at once can create problems, especially in containers or around young plants.
Top 10 Sulfur Application Mistakes to Avoid
- Applying in winter – Microbes are dormant; wait for spring
- Using coarse granules – Choose finer particles for faster results
- Ignoring soil testing – Always test before and after application
- Over-applying – More is not better; follow recommended rates
- Skipping incorporation – Surface applications work slowly
- Poor watering – Inconsistent moisture stops microbial activity
- Mixing with lime – These cancel each other out
- Using old sulfur – Check expiration dates; old sulfur oxidizes slowly
- Ignoring drainage – Waterlogged soil lacks oxygen
- Impatience – Retesting too early; wait minimum 4-6 weeks
Feeding the Microbes Without Raising pH
The Microbe Multiplier Method is not about dumping organic matter into the soil without thinking. The goal is to support microbial activity while keeping the chemical direction acidic. Use finished compost, not fresh alkaline amendments. If compost pH is unknown, use it moderately and test the soil afterward.
Peat moss can also help in some acid-loving plant beds. It is often acidic and improves moisture retention, but it should be used responsibly and mixed well. Pine bark fines can improve structure and drainage in beds for azaleas and blueberries. Avoid fresh wood ash, mushroom compost, and high-calcium amendments in acidification zones.
Do not confuse “feeding microbes” with adding sugar, molasses, or excessive carbon sources. Sulfur oxidation is primarily driven by specialized bacteria that obtain energy from sulfur, not from sugar. Adding large amounts of carbon can create nitrogen tie-up and unpredictable microbial competition. Finished compost and good soil structure are usually the better approach.
How to Lower Soil pH with Sulfur for Specific Plants
Blueberries
Blueberries are one of the most common reasons gardeners search for sulfur for lowering pH in soil. They prefer acidic, well-drained, organic-rich soil. For blueberries, test first and aim for a pH around 4.5 to 5.5. Incorporate elemental sulfur before planting when possible. After planting, use small surface applications around the drip line, water carefully, and mulch with pine bark or acidic organic mulch. Avoid over-applying nitrogen and avoid lime.
Blueberry-Specific Protocol
- Pre-planting: Apply 2-3 lbs sulfur per 100 sq ft, incorporate 8-12 inches deep
- Year 1 maintenance: 0.5 lb per plant, split into spring and fall applications
- Established plants: 0.25-0.5 lb per plant annually, based on soil test
- Mulch: 3-4 inches of pine bark or wood chips
- Testing frequency: Every 3 months during first year, then twice yearly
Azaleas and Rhododendrons
Azaleas and rhododendrons generally prefer pH around 5.0 to 6.0. They also need excellent drainage and organic matter. Apply sulfur before planting if possible. For established plants, lightly scratch sulfur into the surface under the canopy and water in. Add compost or acidic organic mulch to stabilize moisture and microbial activity.
Azalea/Rhododendron Protocol
- Pre-planting: 1.5-2 lbs sulfur per 100 sq ft, incorporate 6-8 inches
- Established plants: 0.25 lb per plant in early spring
- Mulch: 2-3 inches of pine needles or oak leaves
- Water: Keep consistently moist; these plants have shallow roots
Hydrangeas
Hydrangeas can tolerate a wider pH range, but flower color in some bigleaf hydrangeas is affected by aluminum availability, which is influenced by pH. If you are trying to make blue hydrangea flowers, lowering pH can help, but aluminum sulfate is often used for faster color change. Use sulfur for gradual soil acidification and monitor carefully.
Hydrangea Color Control Protocol
- For blue flowers: Target pH 5.2-5.5 with sulfur
- For pink flowers: Target pH 6.0-6.5 (avoid sulfur)
- Quick color change: Aluminum sulfate drench (follow label)
- Long-term: Annual sulfur application based on soil test
Vegetable Gardens
Most vegetables do not need very acidic soil. A pH around 6.0 to 7.0 is ideal for many crops. However, potatoes may benefit from slightly acidic conditions, and lowering pH can help reduce potato scab in some soils. Do not acidify a vegetable bed unless a soil test confirms the pH is too high for your target crop.
Potato-Specific Protocol
- Target pH: 5.0-6.0 to reduce scab
- Application: 1 lb sulfur per 100 sq ft before planting
- Timing: Apply 2-3 months before planting
- Caution: Do not go below pH 5.0; reduces yield
Lawns and Turf
Most lawn grasses prefer pH 6.0-7.0. However, if your soil is highly alkaline (above 7.5), sulfur can help bring it into the optimal range. Apply sulfur to lawns in fall or early spring when grass is actively growing but not stressed by heat.
Lawn Application Protocol
- Rate: 10-20 lbs per 1,000 sq ft (depending on current pH)
- Timing: Fall is ideal; spring is second choice
- Application: Use broadcast spreader; water in immediately
- Frequency: Once per year maximum; retest before reapplying
💡 Quick Tip: Looking for a specific crop, shrub, or flower? Browse our complete Plant pH Database for exact optimal ranges and soil requirements.
Safety and Plant Health Precautions
Elemental sulfur is generally safer than many quick-acid products, but it should still be handled carefully. Avoid inhaling sulfur dust. Wear a mask if applying fine powder on a windy day. Store sulfur away from children, pets, and heat sources. Follow label rates.
Do not assume more sulfur is better. Over-acidification can harm plants by increasing aluminum or manganese availability, reducing phosphorus availability, and disrupting nutrient balance. If plants show yellowing, stunting, leaf burn, or poor growth after pH adjustment, stop applications and retest the soil.
Avoid applying sulfur directly against plant stems or in concentrated bands near young roots. Watering after application helps distribute it into the soil and reduces the chance of surface buildup.
Sulfur Safety Checklist
- ✓ Wear dust mask when applying powdered sulfur
- ✓ Use gloves to prevent skin irritation
- ✓ Apply on calm days to avoid drift
- ✓ Keep away from open flames (sulfur is flammable)
- ✓ Store in cool, dry place away from oxidizers
- ✓ Keep children and pets away during application
- ✓ Wash hands thoroughly after handling
- ✓ Do not mix with lime or bleach products
What to Do If Your Soil Is Very Alkaline or Calcareous
If your soil pH is above 7.5, contains visible calcium carbonate, or has a high buffer pH, sulfur may take longer to work. In these soils, sulfuric acid is consumed by lime before the overall pH drops. You may need repeated applications over several seasons.
For acid-loving plants in highly alkaline regions, consider building raised beds or containers with an acidic growing mix. This is often faster and more reliable than trying to permanently change native alkaline soil. Use a mix designed for acid-loving plants, maintain pH with sulfur or acidifying fertilizers, and test regularly.
If your irrigation water is alkaline, it can slowly raise soil pH over time. In that case, acidification becomes an ongoing maintenance task rather than a one-time correction. Organic mulches, sulfur top-dressings, and periodic testing can help.
Calcareous Soil Management Strategy
| Challenge | Solution | Timeline | Cost |
|---|---|---|---|
| High free lime content | Raised beds with acidic mix | Immediate | Medium-High |
| pH above 8.0 | Split sulfur applications | 2-3 years | Low |
| Alkaline irrigation water | Acid injection or rainwater collection | Ongoing | Medium |
| Slow pH change | Container growing for acid-lovers | Immediate | Low-Medium |
Microbe Multiplier Method Checklist
Use this checklist to get the fastest results from sulfur. Test soil pH and buffer pH. Choose fine or micronized elemental sulfur. Apply when soil is warm. Incorporate lightly into the top few inches of soil. Add finished compost to support microbial life. Water to even moisture. Keep soil damp but not soggy. Avoid lime, wood ash, alkaline compost, and unnecessary antimicrobial products. Retest after 4 to 6 weeks. Apply additional sulfur only if needed.
Complete Application Checklist
- Test soil pH and buffer pH
- Calculate sulfur requirement based on soil type and target pH
- Purchase appropriate sulfur product (micronized for speed)
- Check weather forecast (avoid rain for 24 hours after application)
- Clear area of debris and weeds
- Apply sulfur evenly at calculated rate
- Incorporate into top 2-6 inches of soil
- Add 1/4-1/2 inch finished compost
- Water thoroughly to activate
- Set irrigation schedule for consistent moisture
- Mark calendar for 6-week retest
- Avoid lime/ash applications in area
- Monitor plant health weekly
- Retest pH at 6 weeks
- Adjust maintenance plan based on results
Cost Analysis: Sulfur vs. Alternatives
Understanding the cost implications helps you budget effectively. Elemental sulfur is one of the most economical pH-lowering options available.
Cost Comparison Table (per 1,000 sq ft)
| Product | Cost per lb | Lbs Needed | Total Cost | Duration | Cost per Year |
|---|---|---|---|---|---|
| Elemental Sulfur | $1.50 | 20 lbs | $30 | 12-18 months | $20 |
| Aluminum Sulfate | $2.50 | 50 lbs | $125 | 3-6 months | $250 |
| Iron Sulfate | $2.00 | 40 lbs | $80 | 4-8 months | $120 |
| Ammonium Sulfate | $1.80 | 30 lbs | $54 | 6-12 months | $54 |
Note: Costs are approximate and vary by region and retailer.
Troubleshooting Guide
Problem: pH Not Dropping After 8 Weeks
Possible Causes:
- Soil temperature too cold
- Insufficient moisture
- Sulfur particles too coarse
- High lime content buffering pH
- Poor microbial activity
Solutions:
- Wait for warmer weather
- Increase irrigation frequency
- Apply finer sulfur product
- Split applications over time
- Add compost to boost microbes
Problem: pH Dropped Too Low
Possible Causes:
- Over-application
- Soil more responsive than expected
- Multiple applications too close together
Solutions:
- Stop all sulfur applications
- Apply small amounts of lime (0.5 lb per 100 sq ft)
- Water well to distribute
- Retest in 4 weeks
- Adjust future rates downward
Problem: Plants Showing Stress After Application
Possible Causes:
- Sulfur applied too close to roots
- Over-application causing toxicity
- Rapid pH change stressing plants
Solutions:
- Water deeply to dilute sulfur concentration
- Apply activated carbon to bind excess
- Test pH immediately
- Remove visible sulfur from surface
- Monitor plants closely for 2-3 weeks
Seasonal Maintenance Schedule
Spring (March-May)
- Test soil pH after winter
- Apply sulfur if pH is above target
- Incorporate into soil before new growth
- Water well to activate
- Add compost to support microbes
Summer (June-August)
- Monitor soil moisture carefully
- Maintain consistent watering
- Avoid applications during heat stress
- Observe plant health indicators
- Light top-dressings if needed
Fall (September-November)
- Best time for major sulfur applications
- Soil still warm, microbes active
- Winter moisture will help conversion
- Retest pH from spring applications
- Plan next year’s strategy
Winter (December-February)
- Avoid applications in cold soil
- Review soil test results
- Order sulfur supplies for spring
- Plan raised bed projects if needed
- Research and education
Final Takeaway: Make Sulfur Work by Multiplying Microbial Activity
Sulfur is one of the most effective long-term tools for lowering soil pH, but it is not an instant chemical fix. It works through soil bacteria. If you want to lower soil pH with sulfur as effectively as possible, focus on the Microbe Multiplier Method: choose fine sulfur, apply it in warm soil, incorporate it, add finished compost, maintain even moisture, protect oxygen, and avoid products that suppress microbial life.
This approach gives you a faster, more reliable pH shift than simply spreading sulfur and waiting. It also creates a healthier soil environment for acid-loving plants. If you are trying to learn how to lower pH in soil quickly, the real shortcut is not a miracle product, it is creating the biological conditions where sulfur can do its job.
Remember: patience and proper technique beat brute force every time. Test, apply thoughtfully, support the microbes, and your soil will reward you with the perfect pH for thriving acid-loving plants.